

How to Propagate Peace Lily: Easy Steps to Multiply Your Plant


Propagating a peace lily is a rewarding experience for any plant enthusiast. Not only does it enable you to multiply your beloved plant, but it also offers an opportunity to deepen your understanding of plant care. In this comprehensive guide, we'll explore the straightforward process of peace lily propagation, ensuring you have all the knowledge and tools needed to successfully expand your green family.
Understanding Peace Lily Propagation
Propagation of peace lilies, scientifically known as Spathiphyllum, is primarily achieved through division. This vegetative method is not only practical but also maintains the genetic integrity of the plant. Division involves carefully separating the parent plant into multiple sections, each of which becomes an independent plant. Unlike seed propagation, which can result in variations, division ensures that each new plant retains the characteristics of the parent. This is particularly advantageous for maintaining specific traits like leaf shape, flower size, and overall plant vigor.
When to Propagate Peace Lily
The timing of propagation plays a pivotal role in the success rate. Spring and early summer offer the ideal conditions for peace lilies to root and grow robustly. This period coincides with their natural growth phase, marked by longer daylight hours and warmer temperatures, which stimulate root development and vigorous growth. Propagating during this active growth period means the new plants have the entire growing season ahead to establish themselves, leading to stronger, healthier plants by the onset of winter.
Tools and Preparation
To start, gather the necessary tools and materials:
Sharp, clean scissors or a knife
Potting mix suitable for peace lilies
Pots with drainage holes
Watering can
Gloves (optional)

Step-by-Step Guide: How To Propagate Peace Lily
Step 1: Choosing the Right Plant
Opt for a mature, healthy peace lily that shows signs of vigorous growth. A plant with multiple crowns (growth points) and a robust root system indicates readiness for division and a higher likelihood of successful propagation.
Step 2: Removing the Plant from Its Pot
Carefully extract the peace lily from its container, taking care to minimize root disturbance. For larger plants, this may require gently tapping or rolling the pot to loosen the soil and roots.

Step 3: Inspecting and Cleaning the Roots
Carefully examine the root ball. Healthy roots should be firm and white or tan in color. Remove any excess soil and detangle roots, but do so gently to avoid unnecessary damage. This is also an ideal time to inspect for signs of disease or pests.

Step 4: Dividing the Plant
Look for natural separations in the root ball where the plant can be divided with minimal cutting. Using sterilized tools, gently separate the plant into sections, ensuring each division has at least one healthy crown and an adequate root system.
Step 5: Potting the Divisions
Use a high-quality potting mix designed for indoor plants. Plant each division in a new pot, carefully spreading the roots in the prepared soil. The potting mix should be lightly packed to ensure good contact while still allowing for air and water movement.
Step 6: Watering Newly Potted Divisions
Water each new plant thoroughly to settle the soil around the roots and provide essential moisture. This initial watering is crucial for helping the plant recover from the stress of division.
Aftercare for Propagated Peace Lilies
Light Requirements: Place the new plants in a location where they will receive bright, indirect light. Direct sunlight can be too harsh for young plants, causing leaf burn.
Watering: Maintain a consistent moisture level in the soil, ensuring it stays moist but not waterlogged. The use of a moisture meter can be helpful in determining when to water peace lilies.
Feeding: Hold off on fertilizing for the first 4-6 weeks. Once the plants have established themselves, begin a regular feeding regimen with a balanced, diluted fertilizer.
Monitoring Growth: Watch for signs of stress, such as yellowing leaves or drooping, which can indicate overwatering, under-watering, or a lack of nutrients.
Troubleshooting Common Issues in Propagation
Even with the best care, you might encounter some issues. Here are common problems and solutions:
Root Rot: If you notice black, mushy roots, this indicates root rot. Trim these roots away before potting your peace lily to prevent the spread of rot to healthy parts of the plant.

Drooping Leaves: Transplant shock can cause leaves to droop. Ensure adequate watering and avoid direct sunlight to help the plant recover.
Pest Infestations: Be vigilant for pests like aphids or spider mites. Treat infestations early with insecticidal soap or neem oil to prevent spread.
Benefits of Propagating Peace Lily
Propagating peace lilies is more than just creating new plants. It rejuvenates the parent plant by reducing overcrowding, allowing for better air circulation and nutrient absorption. Sharing these propagated plants can strengthen community bonds, offering a piece of your garden to friends and family. Additionally, peace lilies are known for their air-purifying abilities, helping to improve indoor air quality by filtering out common household toxins.
Propagating a peace lily is a straightforward and enjoyable process. With these steps, you can confidently multiply your peace lilies, enriching your space with more of these elegant and beneficial plants. Remember, each new plant carries a part of its parent's legacy, continuing the cycle of growth and renewal.
Fern's Leafy Learnings
Peace lily propagation is best done through division, ideally in spring or early summer.
Select a healthy parent plant with multiple crowns and a dense root system for propagation.
After dividing, pot each section in suitable soil, ensuring each has roots and a crown.
Post-propagation care involves indirect light, consistent moisture, and delayed fertilization.
Troubleshooting common issues like root rot and transplant shock is key to successful propagation.
Embark on a flourishing journey with plants that aren’t just decor, but companions.
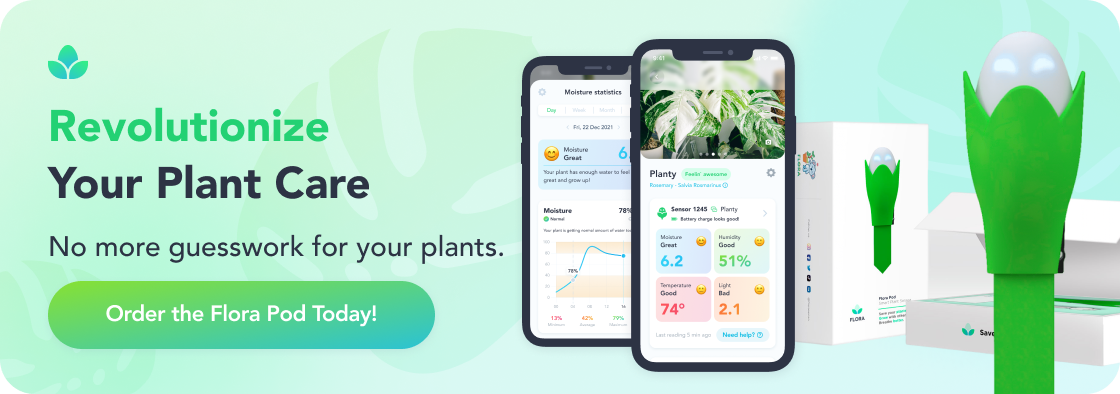
At Flora, we not only bring you a vibrant selection of locally sourced, rare, and delightful plants, but we also serve as your continuous guide in your plant parenting voyage, ensuring every leaf in your sanctuary thrives. With our Flora Pod™ technology and a nurturing community of over 250,000 plant lovers, we cultivate a space where every plant parent - novice or expert - can blossom.
We propagate with a commitment to sustainability, connection, and ceaseless growth, fostering a community where each member, and their plants, are cherished and nurtured.
Crave a lush, thriving green space? Adopt a plant from Flora today!
Flora Pod™ is featured on Shark Tank!


5 Signs Your Houseplant Needs Repotting Now
Mar 02, 2026
6 Anthurium Benefits You Didn't Know About
Mar 02, 2026

How to Prune Your Houseplants Before Spring Growth Season
Mar 02, 2026

10 Best Houseplants for Spring Repotting Success
Mar 02, 2026

Can ZZ Plants Survive in Low Light Conditions?
Mar 02, 2026

5 Critical Pre-Spring Pruning Tips for Houseplants
Mar 02, 2026

Can Succulents Survive Winter Outdoors in Your Climate Zone?
Mar 02, 2026

Which Houseplants Are Toxic to Cats and Should You Avoid Them?
Mar 02, 2026