

Repotting Christmas Cactus: A Comprehensive Guide

Repotting your Christmas Cactus might seem daunting, but it's an essential part of its care routine. In this comprehensive guide on repotting christmas cactus, we'll walk you through the process step-by-step. Whether you’re a novice plant owner or a seasoned gardener, these tips on how to transplant christmas cactus will ensure your beloved plant continues to thrive in its new home.
Understanding When to Repot Your Christmas Cactus
Repotting your Christmas Cactus is a critical aspect of its long-term care and health. These plants generally require repotting every two to four years, a process vital for their continued growth and vitality.
The optimal time for repotting is late winter or early spring, following the flowering period. This timing is strategic as it precedes the plant's active growth phase, allowing it to establish in its new pot before expending energy on growth.
It's important to recognize the signs that your Christmas Cactus is ready to be repotted. One clear indicator is when roots begin to crowd the pot, sometimes even poking out of the drainage holes.
This overcrowding can hinder the plant's ability to absorb water and nutrients effectively. Another sign is if your cactus exhibits slow or stunted growth, which can indicate that it has outgrown its current space and requires more room to expand.
Additionally, if the soil dries out unusually quickly after watering, it may suggest that the roots have taken up too much space, leaving little room for the soil to retain moisture.

Choosing the Right Pot and Soil
Selecting an appropriate pot and soil mix is fundamental for the health of your repotted Christmas Cactus.
When choosing a new pot, opt for one that is only slightly larger than the current one. This is because a significantly larger pot can hold too much moisture around the roots, increasing the risk of root rot. A pot that's too small, however, won't provide enough space for growth.
Ensure the new pot has sufficient drainage holes to allow excess water to escape, which is crucial for preventing waterlogged soil conditions.
For the soil, it's essential to use a mix that promotes good drainage while retaining enough moisture to meet the plant's needs.
A commercial cacti and succulent potting mix is often ideal, as these are formulated to provide the right balance of aeration and moisture retention. These mixes usually contain a combination of soil, perlite, and sand, offering an environment that mimics the natural habitat of the Christmas Cactus.
If you prefer to mix your own, a blend of regular potting soil with perlite or coarse sand can work well too.

Step-by-Step Guide to Repotting
Preparation: Before you start, water your Christmas Cactus a few days in advance. This makes it easier to remove from the pot and reduces stress on the plant.
Removing the Plant: Gently remove the cactus from its pot. If it’s stuck, tap the sides of the pot or run a knife around the edge to loosen the soil.
Root Inspection: Once out, inspect the roots. Trim any dead or rotting roots with sterilized scissors. This promotes healthy growth after repotting.
Repotting: Place a layer of fresh soil in the new pot. Then, set your plant in, ensuring it’s at the same depth as in the old pot. Fill around the plant with more soil, but don’t pack it too tightly.
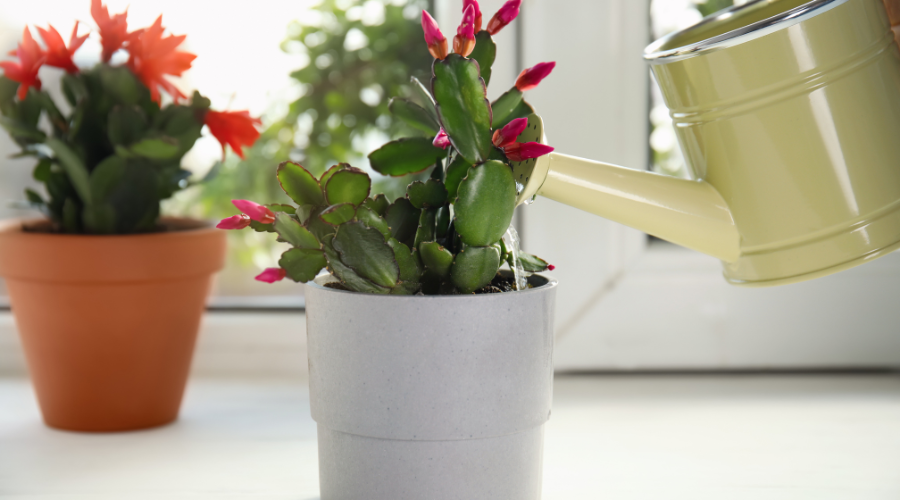
Aftercare: Water the plant lightly after repotting to settle the soil. Then, resume your regular christmas cactus watering routine.
Transplanting Christmas Cactus: Additional Tips
Transplanting your Christmas Cactus is also an excellent opportunity to assess the overall health of your plant. When removing the cactus from its current pot, gently shake off the old soil and inspect the roots for any signs of disease or rot.
Trimming off any unhealthy roots can encourage healthier growth post-transplant.
Also, check for any signs of pests or diseases on the plant itself, such as discolored or damaged leaves, and treat them as necessary.
After repotting, it's advisable to keep your Christmas Cactus in a shaded area for a few days. This period allows the plant to adjust to the shock of repotting without the added stress of bright light.
Gradually reintroduce the plant to its usual spot, ensuring it doesn't receive too much direct sunlight immediately after repotting.

Maintaining Your Repotted Christmas Cactus
Post-repotting care is crucial in ensuring your Christmas Cactus adapts well to its new pot. In the weeks following repotting, avoid placing the plant in direct sunlight. This can cause stress and scorching while the plant is still settling into its new environment.
Keep the soil lightly moist, but be careful not to overwater, as the plant will be more susceptible to root rot during this adjustment period.
Refrain from fertilizing the plant for at least a month after repotting. The new soil will typically have enough nutrients to support the plant initially, and additional fertilizer can overwhelm and burn the newly adjusting roots. With attentive care and appropriate environmental conditions, your Christmas Cactus will gradually adapt to its new pot and continue to grow and thrive healthily.
Fern's Leafy Learnings
Repot Christmas Cactus every few years, ideally in late winter or early spring, when you notice signs of root crowding.
Choose a slightly larger pot with good drainage and a well-draining soil mix.
Follow the step-by-step guide: prepare, gently remove the plant, inspect and trim roots, repot, and provide aftercare.
After repotting, keep the plant in a shaded area and resume regular watering.
Post-repotting care includes avoiding direct sunlight and fertilization for a month, ensuring the plant settles well in its new pot.
Embark on a flourishing journey with plants that aren’t just decor, but companions.
At Flora, we not only bring you a vibrant selection of locally sourced, rare, and delightful plants, but we also serve as your continuous guide in your plant parenting voyage, ensuring every leaf in your sanctuary thrives. With our Flora Pod™ technology and a nurturing community of over 250,000 plant lovers, we cultivate a space where every plant parent - novice or expert - can blossom.
We propagate with a commitment to sustainability, connection, and ceaseless growth, fostering a community where each member, and their plants, are cherished and nurtured.
Crave a lush, thriving green space? Adopt a plant from Flora today!
Flora Pod™ is featured on Shark Tank!


5 Signs Your Houseplant Needs Repotting Now
Mar 02, 2026
6 Anthurium Benefits You Didn't Know About
Mar 02, 2026

How to Prune Your Houseplants Before Spring Growth Season
Mar 02, 2026

10 Best Houseplants for Spring Repotting Success
Mar 02, 2026

Can ZZ Plants Survive in Low Light Conditions?
Mar 02, 2026

5 Critical Pre-Spring Pruning Tips for Houseplants
Mar 02, 2026

Can Succulents Survive Winter Outdoors in Your Climate Zone?
Mar 02, 2026

Which Houseplants Are Toxic to Cats and Should You Avoid Them?
Mar 02, 2026