Spring Tulip Planting: Is It Too Late?
As spring blossoms, many gardeners wonder if they've missed the opportunity to see their gardens erupt in the vibrant colors of tulips. The primary query, "can you plant tulips in the spring," often pops up among gardening communities. This guide will navigate the feasibility of spring tulip planting, optimal conditions, and techniques to ensure your tulips thrive even if they're planted outside the traditional fall schedule.
Tulips are not only celebrated for their bright and varied hues but also play a pivotal role in heralding spring in many gardens around the world. The traditional method involves planting the bulbs during the autumn months. This timing is crucial as it allows tulips to undergo the winter chilling period they require to bloom spectacularly in spring. The cold period activates key biological processes within the bulb, setting the stage for the growth and development of the flower in the warmer months.
However, if you discover that you have tulip bulbs during spring, it's not too late to act. Although planting at this time deviates from the norm, with some adjustments, you can still cultivate a beautiful display of tulips. Adapting your approach to accommodate a spring planting involves several critical considerations and techniques to ensure that the bulbs still manage to thrive and bloom.
When to Plant Tulips Bulbs?

The best time for planting tulip bulbs is in the fall, several weeks before the ground freezes. Depending on your geographical location, this typically falls between late September and early December. Here’s a more detailed guide based on climate zones:
In colder northern climates (Zones 3-5): Aim to plant tulip bulbs in September or October. This timing allows the bulbs to establish roots before the ground freezes.
In milder climates (Zones 6-7): You can usually plant bulbs from October through November. The slightly warmer soil later in the season still provides enough cool temperatures for the bulbs to root without the risk of frost heaving them out of the ground.
In warm southern climates (Zones 8-9): Planting in November or December is best. In these zones, the ground doesn’t freeze, and later planting helps ensure the bulbs experience cooler temperatures during their critical rooting period.
Planting at the right time ensures that tulip bulbs undergo the necessary cold period to bloom prolifically in the spring. The bulbs should be in the ground before the winter chill sets in, giving them time to establish a robust root system.
Can You Plant Tulips in the Spring?

Indeed, while autumn is the recommended planting season for tulip bulbs, engaging in spring planting can still yield positive outcomes. The primary concern with spring planting revolves around ensuring that the tulip bulbs have undergone a sufficient dormancy period in cold conditions. This period is essential for the bulbs to develop the reserves they need to support flowering.
For those who may have overlooked planting their bulbs in the fall, or those who have recently come into possession of tulip bulbs, mimicking the natural winter conditions can provide a solution. Here’s how you can effectively manage spring planting:
1. Chilling Your Bulbs
To simulate the winter chilling necessary for your tulips, place the bulbs in a refrigerator for 12 to 16 weeks. It's vital to store them away from any fruits, as fruits release ethylene gas as they ripen, which can be detrimental to the health of the bulbs. This process is crucial for initiating the dormancy break that tulips would naturally undergo during the winter.
2. Choosing the Right Time
Timing your planting is crucial. Ideally, plant the bulbs as soon as the soil is thawed enough to be workable and after the risk of severe frost has passed. Planting at this time maximizes the bulbs' growing period before the onset of warmer summer months, allowing them to establish roots and, ideally, bloom.
3. Planting Depth and Position
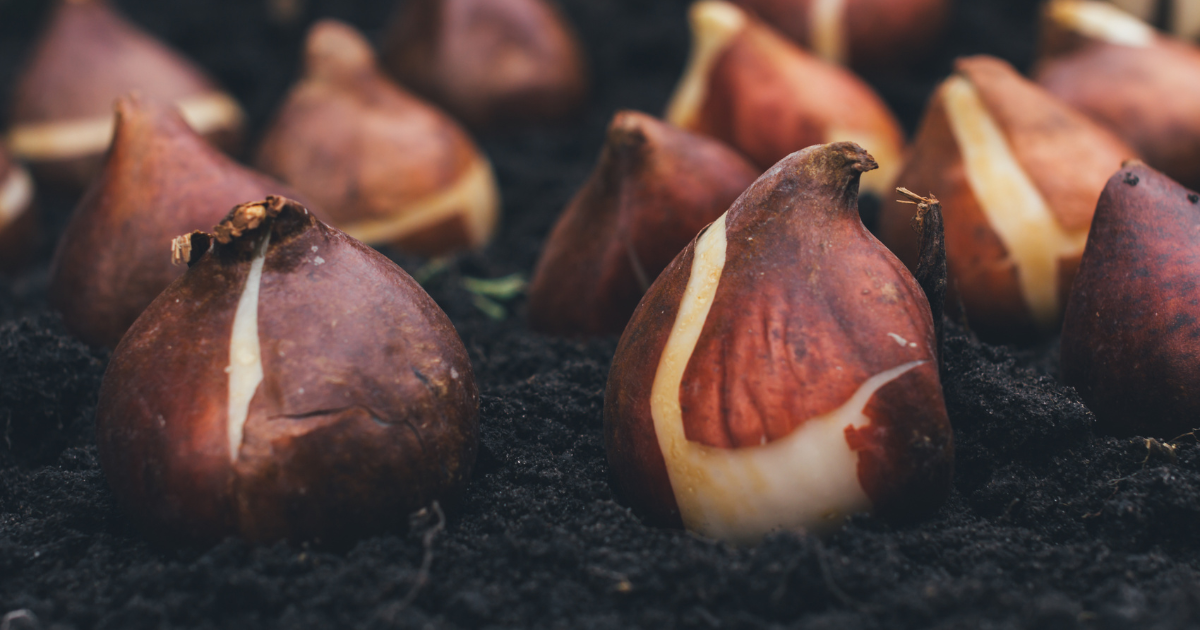
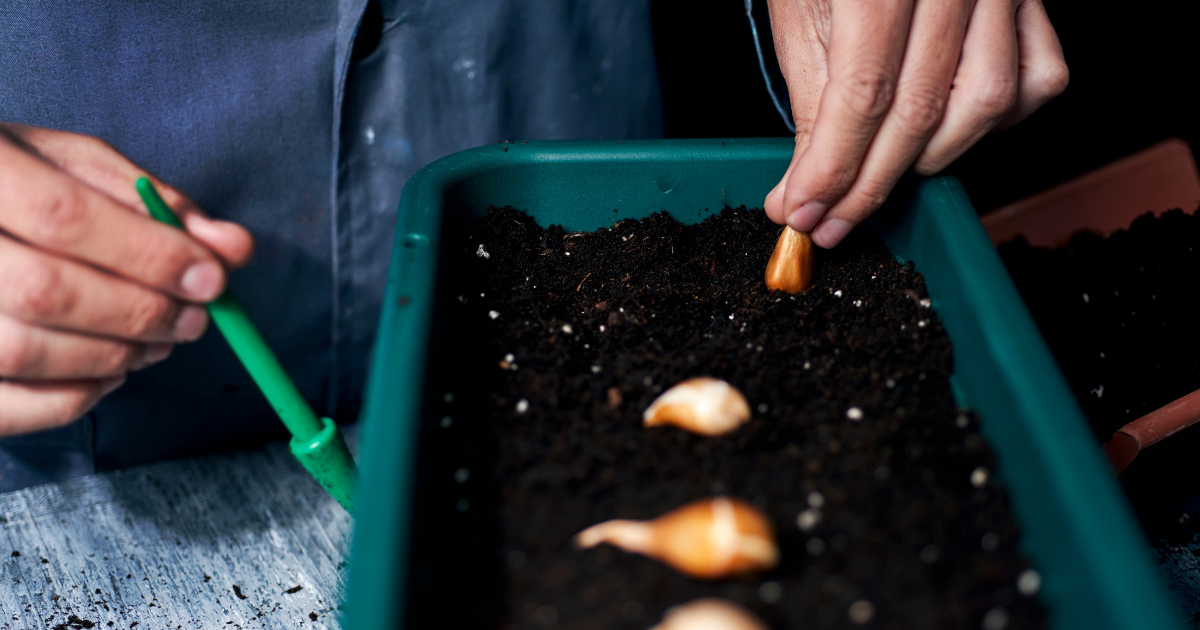
When planting tulip bulbs, depth is a critical factor. Planting them at least three times the height of the bulb ensures that they are sufficiently insulated from surface temperature variations and helps prevent the bulbs from emerging too early. The bulbs should be placed with their pointed end up, which is the direction from which the stem will grow. Proper depth placement also provides the necessary stability for root development, which is crucial for the health and stability of the tulip as it grows
By understanding and adapting these planting practices, even spring-planted tulips can contribute to a vibrant and colorful garden display, proving that with a bit of extra care and attention, it’s not too late to enjoy these beloved spring flowers.
Best Practices for Planting Tulip Bulbs
Achieving a thriving display of tulips, even when planting conditions are not ideal, is entirely possible with adherence to best gardening practices. These tips are designed to optimize the health and beauty of your tulips, taking into account the specific needs of these popular flowers.
Soil Preparation

The foundation of successful tulip growth starts with proper soil preparation. Tulips require well-draining soil to prevent water from pooling around the bulbs, which can lead to rot and fungal diseases. To ensure the soil is well-prepared:
Assess Soil Type: Loamy or sandy soils are ideal because they naturally ensure good drainage. If you have heavy clay soil, it will require significant amendment.
Amend the Soil: Incorporate generous amounts of compost or aged manure into the planting site. This not only improves drainage but also enhances soil fertility. Rich, fertile soil is crucial for supporting the robust growth of tulips.
Check Soil pH: Tulips prefer a slightly acidic to neutral pH. If necessary, adjust the soil pH using soil amendments. Proper pH levels facilitate nutrient uptake and contribute to overall plant health.
These soil preparation steps are vital for creating an environment that supports healthy bulb development and flowering.
Watering Needs
Water management is crucial in tulip care, especially post-planting. Proper watering techniques help establish the bulbs and promote strong root systems:
Initial Watering: Immediately after planting, water the bulbs deeply. This helps to settle the soil around the bulbs and eliminate any air pockets, which can dry out the bulbs.
Ongoing Watering Schedule: Tulips need consistent moisture but are prone to problems in overly wet conditions. Water the plants during dry spells in spring, providing enough moisture to keep the soil lightly moist but not soggy.
Monitoring: Use your finger to check the moisture level of the soil. Water only when the top inch of soil feels dry to the touch.
Proper watering practices ensure that tulips receive adequate hydration without the risk of overwatering, which is a common mistake that can lead to bulb decay.
Mulching
Mulching serves several purposes in the tulip garden:
Temperature Control: A light layer of organic mulch such as straw, bark, or shredded leaves helps regulate soil temperature. This is particularly beneficial in spring when temperature fluctuations can stress plants.
Moisture Retention: Mulch helps retain soil moisture, keeping the roots moist but not waterlogged.
Weed Suppression: Mulch effectively suppresses weeds, reducing competition for nutrients and water. It also prevents weeds from becoming established, which could disturb delicate tulip bulbs if removed.
Preventing Soil Compaction: Mulch acts as a buffer between the soil and environmental elements, reducing the impact of heavy rains and preventing soil compaction.
Applying a light layer (about 2-3 inches) of mulch after planting will not only enhance the growing conditions but also contribute to a more orderly and attractive tulip bed.
By following these best practices for soil preparation, watering, and mulching, you can significantly improve the conditions for growing tulips, even if your planting time or conditions are less than ideal. This approach, centered on understanding and catering to the specific needs of tulips, ensures the best possible outcome for your garden.
Care After Planting Tulip Bulbs
Proper care after planting tulip bulbs is essential to ensure they flourish and return year after year with vibrant blooms. This section discusses three critical aspects of post-planting care: fertilization, staking, and post-bloom care. Each plays a vital role in the lifecycle and longevity of tulip flowers.
Fertilization
Fertilizing tulips at the right time and with the right nutrients can significantly enhance their growth and blooming potential. Here's how to do it effectively:
Choosing the Right Fertilizer: Use a balanced, slow-release bulb fertilizer that provides nutrients gradually over time. This type of fertilizer ensures that tulips receive a steady supply of essential nutrients as they grow.
Timing: The best time to fertilize tulips is when you first see shoots emerging from the ground in early spring. This initial feeding supports root development and sets the stage for a healthy bloom.
Application: Apply the fertilizer according to the package instructions, usually around the base of the plants, and be careful not to let the fertilizer contact the foliage directly, as this can cause burn injuries.
Staking
Staking may be necessary for certain situations and is particularly important for taller tulip varieties:
Why Stake: Tall tulips or those in very exposed locations can be vulnerable to strong winds. Staking helps prevent the stems from bending or breaking.
How to Stake: Use a thin stake or rod, and gently tie the tulip stem to the stake with soft garden ties. Make sure the ties are loose enough to allow some natural movement but tight enough to support the plant.
Aesthetics: Be mindful of the appearance—stakes should be as unobtrusive as possible to maintain the natural beauty of your tulip display.
Post-Bloom Care

After tulips bloom, they enter a critical phase of energy accumulation for the next growing season:
Leave the Foliage: Resist the urge to remove tulip leaves after the flowers have faded. The foliage continues to photosynthesize, creating food (stored as carbohydrates in the bulb) that fuels next year's growth and blooming.
Watering: Continue to water the plants as needed until the foliage naturally yellows and dies back.
Foliage Removal: Only remove tulip leaves when they have completely yellowed and become loose at the base. This indicates that the plant has redirected all available nutrients to the bulb.
By implementing these comprehensive care strategies—fertilization, staking, and diligent post-bloom maintenance—you can significantly enhance the vitality and lifespan of your tulips, ensuring they remain a highlight in your garden for many seasons.
Fern's Leafy Learnings
Spring tulip planting is feasible with proper preparation, including chilling unplanted bulbs in your refrigerator for 12-16 weeks.
Plant tulip bulbs as soon as the ground is workable after the last frost, ensuring they are planted at a depth three times their height.
Ensure good drainage and avoid water logging to promote healthy tulip growth.
After blooming, allow tulip foliage to die back naturally to foster energy storage for the next growth cycle.
Use a balanced, slow-release fertilizer to support tulip health and blooming, especially when planted out of season.
Deepen Your Roots with Flora
At Flora, we not only bring you a vibrant selection of locally sourced, rare, and delightful plants, but we also serve as your continuous guide in your plant parenting voyage, ensuring every leaf in your sanctuary thrives. With our Flora Pod™ technology and a nurturing community of over 250,000 plant lovers, we cultivate a space where every plant parent - novice or expert - can blossom.
We propagate with a commitment to sustainability, connection, and ceaseless growth, fostering a community where each member, and their plants, are cherished and nurtured.
Crave a lush, thriving green space? Adopt a plant from Flora today!
Flora Pod™ is featured on Shark Tank!

Shop Plants
Top 10 Most Popular Roses
Mar 22, 2022
How to Care for China Roses
Mar 11, 2022
How to Care for Chinese Money Plants
May 15, 2020
How to Grow and Care for A Bird of Paradise
Apr 26, 2020
Top 10 Plants To Grow In A Terrarium
May 31, 2022
How to Grow and Care for Lucky Bamboo
Mar 29, 2022
How to Grow and Care for Corn Plants
Mar 29, 2022
How to Care for Madagascar Dragon Trees
Mar 21, 2022


