

Vera Easy: How to Transplant an Aloe Vera Plant


Transplanting aloe vera is a straightforward process that, when done correctly, can significantly benefit the health and growth of your plant. This guide will walk you through the steps of transplanting aloe vera, ensuring your plant thrives in its new environment.
Understanding the Need for Transplanting
Aloe vera plants often need to be transplanted when they outgrow their pots or when their soil becomes depleted of nutrients. Signs that your aloe vera needs transplanting include roots appearing from the drainage holes, the plant becoming top-heavy, and new leaves being smaller and less vibrant.
When to Transplant Aloe Vera

The best time to transplant aloe vera is during the spring or early summer. During this period, the plant is actively growing and can recover more quickly from the transplanting process. Transplanting during the growing season ensures that the plant has sufficient energy to adapt to its new environment.
Preparing for Aloe Vera Transplanting
Selecting the Right Container
Choose a new pot that is slightly larger than the current one to give the roots more room to grow. A wide, shallow pot is ideal as aloe vera plants have shallow root systems. Terra cotta or unglazed ceramic pots are preferable because they allow the soil to breathe and prevent waterlogging, which can cause root rot.
Choosing Soil and Ensuring Proper Drainage
Aloe vera requires well-draining soil. A cactus or succulent potting mix is ideal. You can also create your own mix by combining equal parts of sand, perlite, and regular potting soil. Ensure the new pot has drainage holes at the bottom to allow excess water to escape, preventing the roots from sitting in water.

How To Transplant An Aloe Vera Plant
1. Remove the Aloe Vera Plant

Water the aloe vera plant a day before transplanting to make it easier to remove from its pot. This ensures the soil is slightly moist and helps prevent root damage during removal. Gently loosen the soil around the plant using a hand trowel or by tapping the sides of the pot. Carefully tip the pot on its side and coax the plant out, supporting the root ball to avoid damage. If the plant is stubborn, gently wiggle it back and forth while pulling.
Detailed Steps
Water the Day Before: This softens the soil, making it easier to work with.
Loosen the Soil: Use a hand trowel to gently break the soil away from the edges of the pot.
Tip and Remove: Turn the pot on its side and gently pull the plant, using a wiggling motion if necessary.
2. Inspect and Clean the Roots

Inspect the roots for any signs of disease or rot. Healthy roots should be white or light brown. Trim away any dark, mushy, or damaged roots with sterilized scissors. If your aloe vera has pups (small offshoots), you can separate them now to plant them individually. Be sure to handle the roots gently to avoid unnecessary stress on the plant.
Detailed Steps
Inspect Roots: Look for healthy white or light brown roots and identify any that are damaged or diseased.
Trim Damaged Roots: Use sterilized scissors to cut away dark, mushy, or unhealthy roots.
Separate Pups: If there are small offshoots (pups), carefully separate them from the main plant for individual planting.
3. Prepare the New Pot

Place a layer of gravel or small stones at the bottom of the new pot to improve drainage. This helps prevent water from accumulating at the base, which can cause root rot. Fill the pot with the well-draining soil mix, creating a small mound in the center where the root ball will sit. A mix of cactus soil, perlite, and sand works well for aloe vera plants.
Detailed Steps
Layer Gravel/Stones: Ensure the bottom of the pot has a layer of gravel or small stones for drainage.
Fill with Soil Mix: Use a well-draining mix of cactus soil, perlite, and sand.
Create a Mound: Form a small mound in the center of the pot to help position the root ball properly.
4. Transplant the Aloe Vera
Position the aloe vera plant on top of the mound, ensuring it sits at the same depth as it was in the previous pot. Fill in around the root ball with more soil, gently pressing it down to eliminate air pockets. Be careful not to bury the leaves, as this can cause them to rot. Ensure the plant is stable and upright.
Detailed Steps
Position the Plant: Place the aloe vera on top of the soil mound.
Maintain Depth: Ensure the plant sits at the same depth as it was previously planted.
Fill and Press Soil: Add more soil around the root ball and press gently to remove air pockets.
Avoid Burying Leaves: Keep the leaves above the soil to prevent rot.
5. Watering
After transplanting, water the plant thoroughly but ensure the soil drains well. This initial watering helps settle the soil around the roots. Avoid watering again for the next few days to allow the plant to adjust to its new environment and to prevent root rot. Monitor the plant and water only when the top 2-3 inches of soil are dry.
Detailed Steps
Initial Watering: Water thoroughly to settle the soil around the roots.
Ensure Drainage: Make sure the pot drains well to avoid waterlogging.
Pause Watering: Wait a few days before the next watering to allow the plant to adjust.
Monitor Soil Moisture: Water only when the top 2-3 inches of soil are dry.
Post-Transplant Care
.png")
Light and Temperature
Place the newly transplanted aloe vera in a location that receives bright, indirect sunlight. Direct sunlight can cause the leaves to sunburn, especially immediately after transplanting. Maintain a stable temperature between 55°F and 80°F.
Watering
After the initial watering, allow the soil to dry out completely before watering again. Aloe vera plants prefer infrequent, deep watering to mimic their natural arid environment. Overwatering can lead to root rot, so it's essential to let the soil dry out between waterings.
Monitoring for Transplant Shock
Monitor the plant for signs of transplant shock, such as wilting, yellowing leaves, or slowed growth. Ensure it has adequate humidity and nutrients to recover. If needed, mist the plant or place a tray of water nearby to increase humidity levels.
Transplanting aloe vera is a simple process that can greatly benefit the health and growth of your plant. By choosing the right time, preparing adequately, and following the correct steps, you can ensure your aloe vera plant thrives in its new pot. Proper post-transplant care is crucial to help the plant adjust and continue to grow healthily.
Fern's Leafy Learnings
Best Timing: Transplant aloe vera during the spring or early summer when the plant is actively growing.
Container Choice: Use a wide, shallow pot made of terra cotta or unglazed ceramic with proper drainage.
Soil Preparation: Use a well-draining cactus or succulent mix, or create your own with sand, perlite, and potting soil.
Watering Strategy: Water thoroughly after transplanting, then allow the soil to dry out completely before the next watering.
Post-Transplant Care: Place in bright, indirect sunlight and monitor for signs of transplant shock, adjusting care as needed.
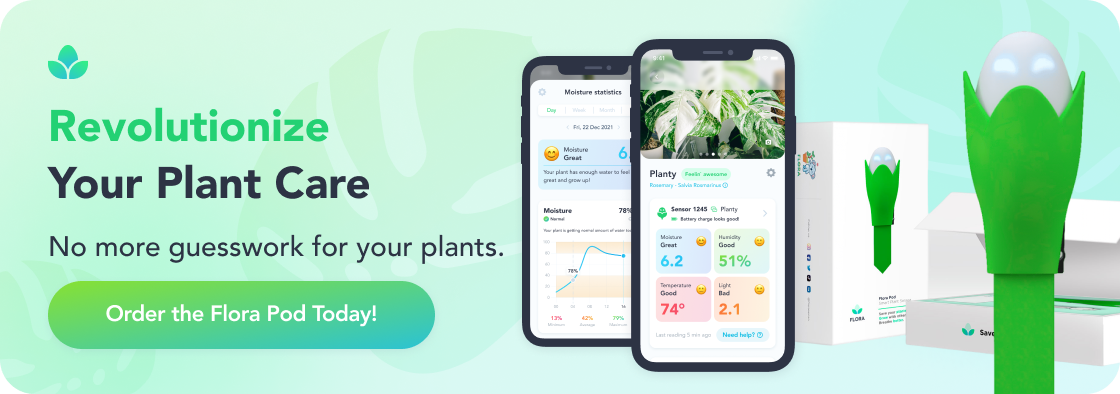
Deepen Your Roots with Flora
At Flora, we not only bring you a vibrant selection of locally sourced, rare, and delightful plants, but we also serve as your continuous guide in your plant parenting voyage, ensuring every leaf in your sanctuary thrives. With our Flora Pod™ technology and a nurturing community of over 250,000 plant lovers, we cultivate a space where every plant parent - novice or expert - can blossom.
We propagate with a commitment to sustainability, connection, and ceaseless growth, fostering a community where each member, and their plants, are cherished and nurtured.
Crave a lush, thriving green space? Adopt a plant from Flora today!
Flora Pod™ is featured on Shark Tank!

5 Signs Your Houseplant Needs Repotting Now
Mar 02, 2026
6 Anthurium Benefits You Didn't Know About
Mar 02, 2026

How to Prune Your Houseplants Before Spring Growth Season
Mar 02, 2026

10 Best Houseplants for Spring Repotting Success
Mar 02, 2026

Can ZZ Plants Survive in Low Light Conditions?
Mar 02, 2026

5 Critical Pre-Spring Pruning Tips for Houseplants
Mar 02, 2026

Can Succulents Survive Winter Outdoors in Your Climate Zone?
Mar 02, 2026

Which Houseplants Are Toxic to Cats and Should You Avoid Them?
Mar 02, 2026